Today I am going to show how we can make and ultra-portable Fridge. This is ultra-chip too. The basic concept behind this is Thermoelectric Effect. A thermoelectric device creates voltage when there is a different temperature on each side. Conversely, when a voltage is applied to it, it creates a temperature difference.
Required components:
- Thermoelectric plate
- 2 CPU cooler
- Heat Sink Pest
- Plastic container
- Thermocol Sheet (1inch width)
- Aluminum Foil
- DHT11 (Temp & Humidity Sensor)
- Attiny84
- 16×2 LCD
- 220Ω Resistor
- 10k preset resistor
- Pust Switch
- 10k Resistor
- 7805 Voltage Regulator,
- 10μF Capacitor
- Veroboard
- Wire and tools
- 12v SMPS with minimum 5Amp current capability
Thermal Container Design: The most important part of this project is to make an good thermal-isolated container. Better thermal isolation will help to achieve lower temperature. A 3D printed container filled with foam would be the best option. But If you do not have 3D printer you need not to be worry. You can easily create a reasonable good thermal isolated container as I did.
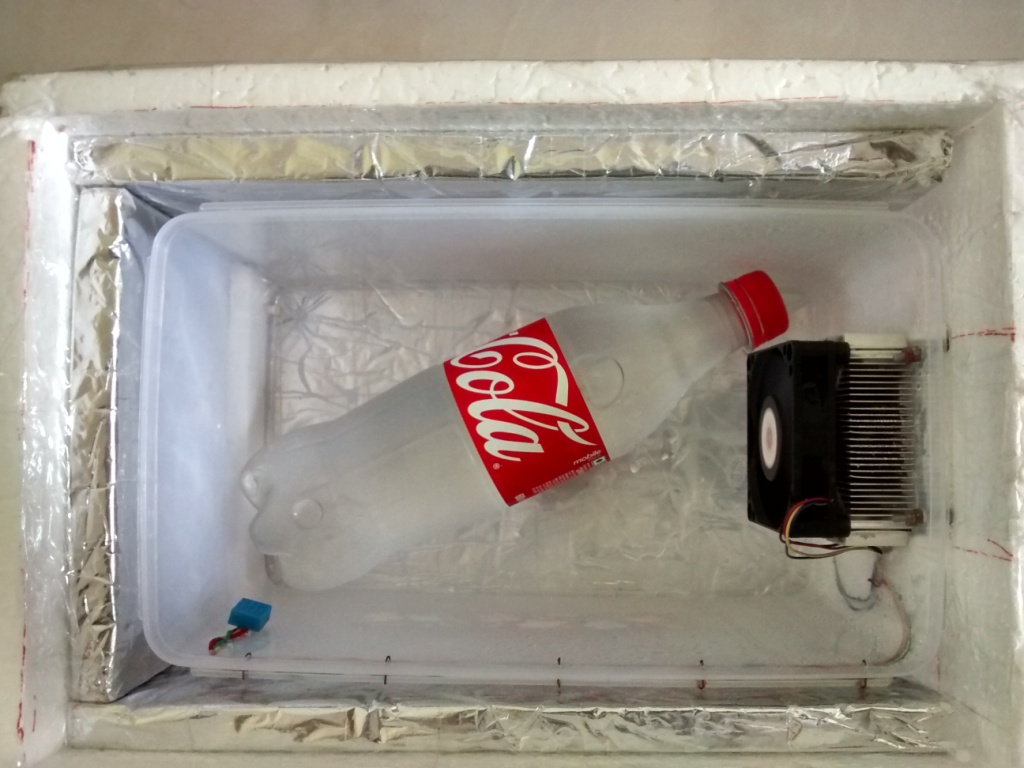
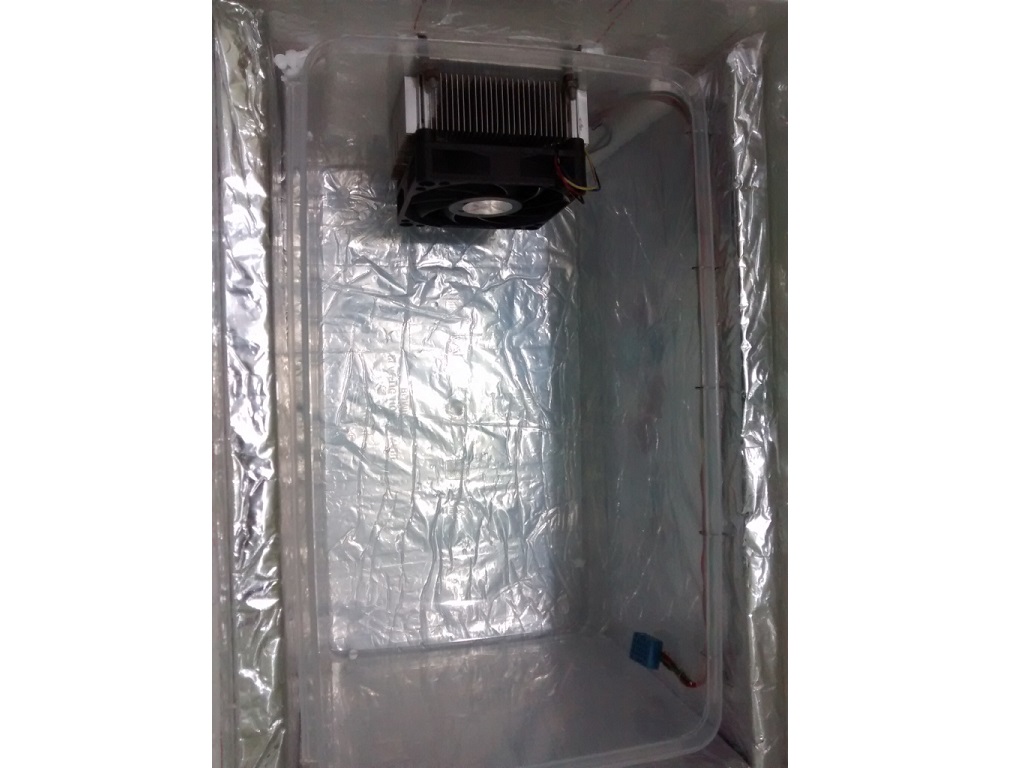
There are two parts of the container, inner Plastic Container and outer Thermocol Container. The plastic container holds the thermometric plate and cooler assembly. For this I choose a plastic box with dimension 12″ x 6″ x 9″. This is enough for 3-4 drinks bottle. Make a square hole at the middle of the smaller side of the container. The thermoelectric plate should be exactly fit in this hole. Now place one CPU cooler inside the container and mark for screw hole. Make sure the thermoelectric plate is placed exactly center of CPU cooler. Do the same process for outside cooler. Do not forget to apply heat-sink paste in between booth the cooler and thermoelectric plate before tighten the screw.
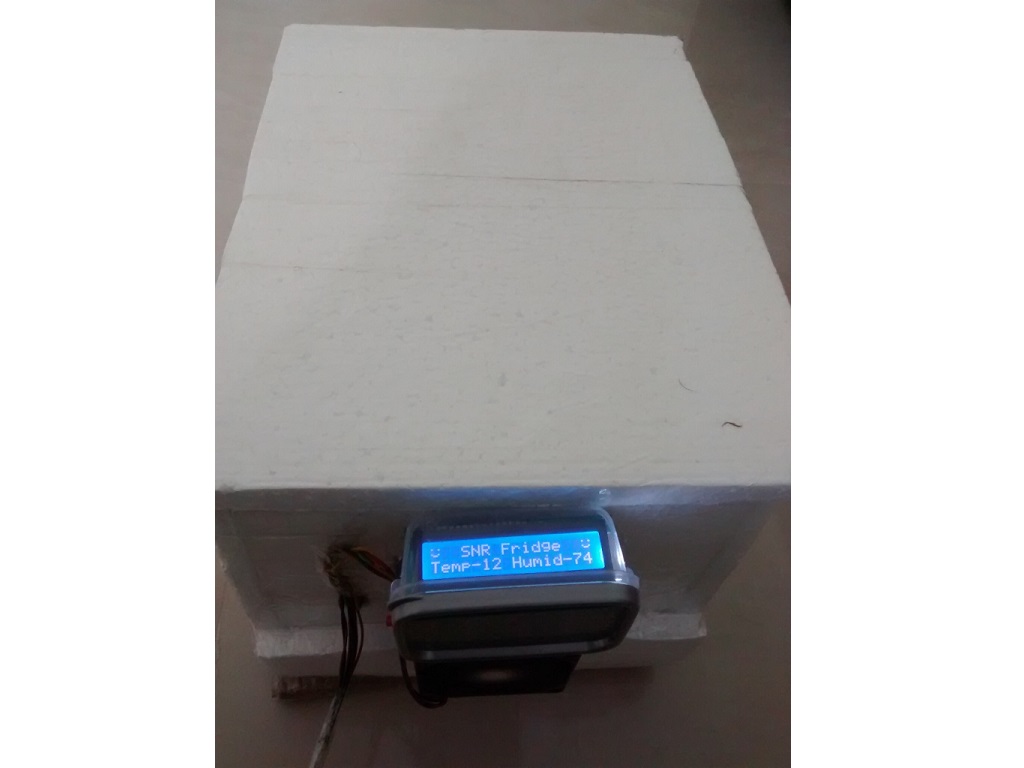
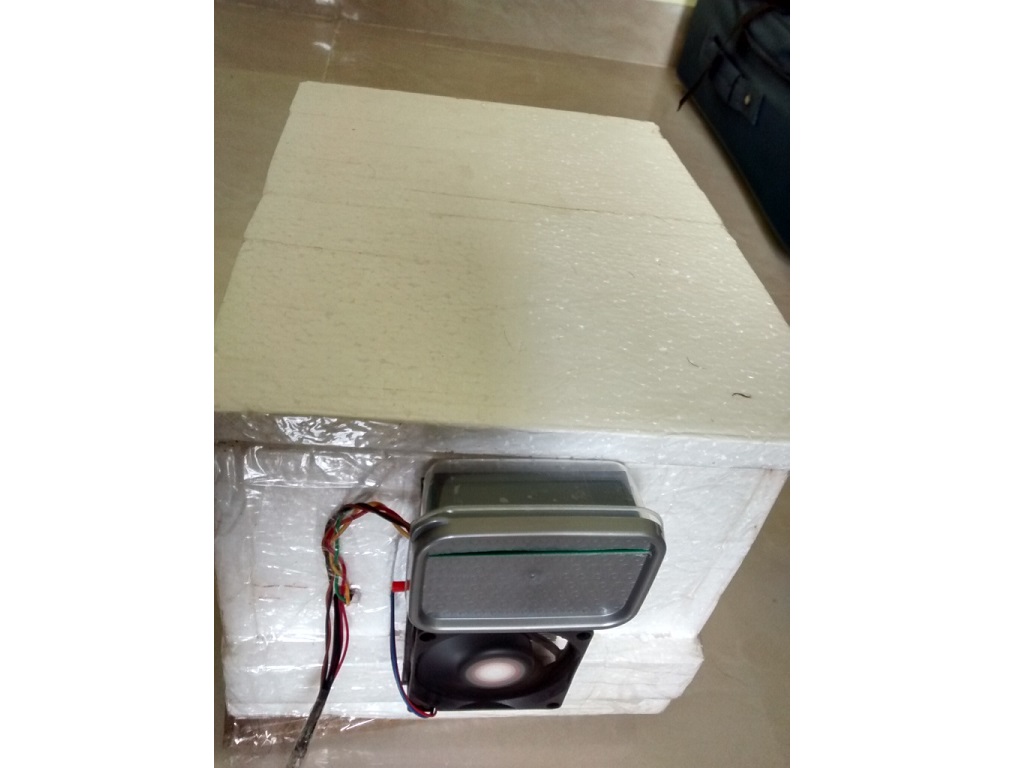
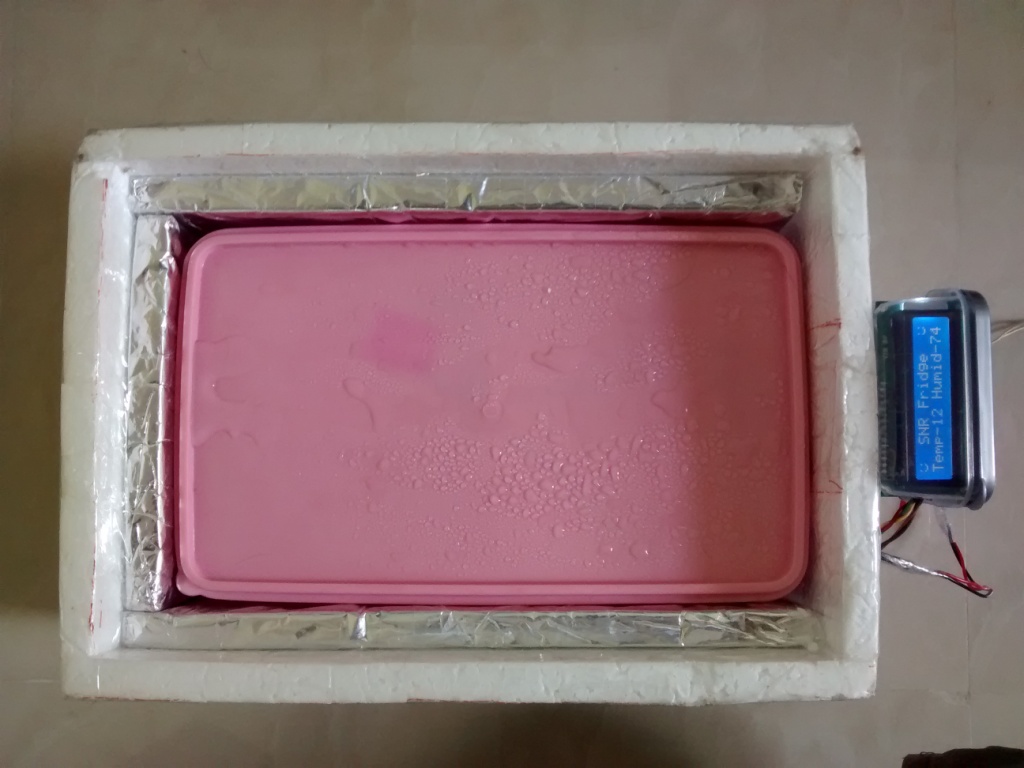
As I already have mentioned that the trickiest part of this project is to make a good thermally isolated container, the efficiency is completely dependent on it. I have achieved as low as 10°C when my room temperature is 25°C. Use your awesome creativity to make it better. I have put two sheets of thermocol except the side in which cooler assembly is present. The inner side thermocol is wrapped with aluminum foil. This reduces heat radiation. I used 3″ wide tape to make this thermocol container.
Here is my prototype
Control System Design: This part is optional if lowest achieved temperature is not less than 0°C. But it is essential if the temperature goes lower than 0°C. Here I have not used auto shut-down logic. As my thermal container is not efficient enough to go below 0°C I have not used it. For this functionality we need add an opto-isolater and relay to shut-down the power of thermoelectric plate.
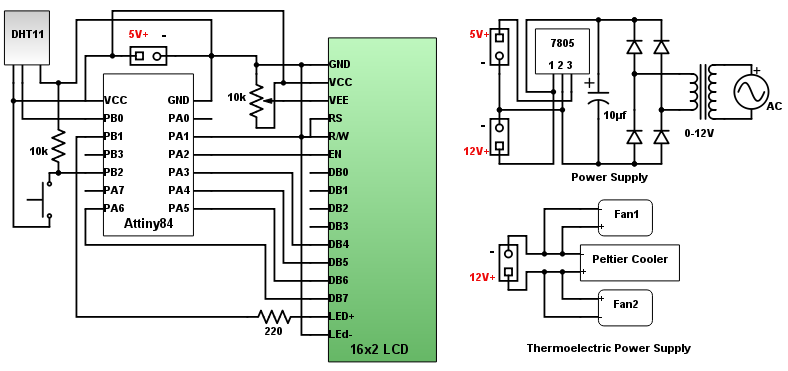
The heart of this part is Attiny84. You can use Arduino instead. But this will increase both cost and size. Here I have used Arduino environment to write code. To know how to use Arduino code in Attiny please follow High-Low Tech tutorial. Use 8MHz internal oscillator as clock.
The sensor I have used is DHT11. It is very cheap digital temperature and humidity sensor and available in eBay. The error margin of this sensor is also very minimal. It require only 1 wire (also need +V and Gnd apart from Data) to communicate with microcontroller. There are multiple DHT11 library available to for Arduino. Click Here to download the library I used. This library worked properly with Attiny84. Put the sensor as far as possible from the cooler assembly so that you can sure the temperature in all other place is lower than measured.
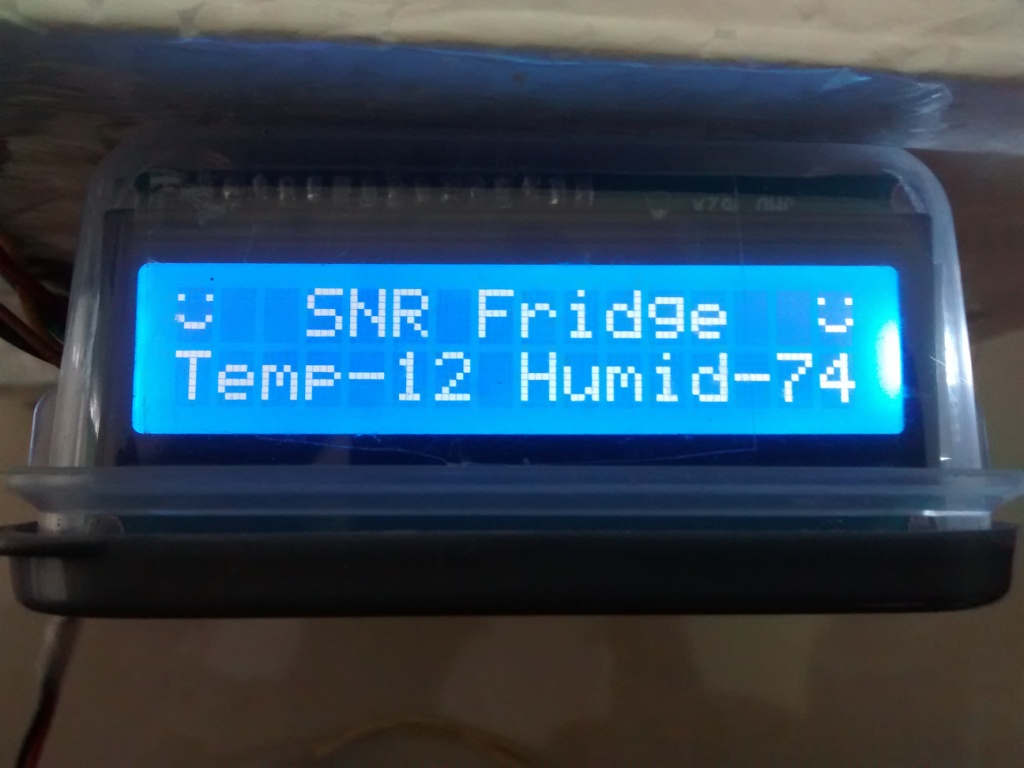
For display purpose I have used a 16*2 LCD display. It is also very cheap and enough for displaying the information I need. The back-light of LCD will turn off after 30 sec. To turn on the attached push button have to be pressed.
Control circuit operates in 5v DC. I have used 7805 voltage regulator as main power supply 12v DC. You can use 5v power supply of the SMPS.
Power Supply: The thermoelectric plate needs minimum 2A current at 12v. For good efficiency we need to use 5A power supply. 5A DC power supply is pretty costly. So I choose computer SMPS which can provide max 20 Amp current at 12v and it is cheaper. We must short green wire with ground to make SMPS work.
If you have a 2A transformer you can use bridge rectifier and filter circuit as power supply.
Circuit Diagram:
Code for DHT11 and Display:
Click Here to download DHT11 Library.
#include <LiquidCrystal.h>
#include <dht11.h>
#define DHT11PIN 10  //DHT Sensor on pin 10
#define Backlight 9  //LCD Backlight on pin 9
dht11 DHT11;
LiquidCrystal lcd(1, 2, 3, 4, 5, 6); // RS-->1, E-->2, D4-->3, D5-->4, D6-->5, D7-->6, RW-->Gnd
unsigned long refreshDHTmillis = 0;
unsigned long backlightMillis = 0;
//Switch interrupt pin 8
//Unused pin 0, 7
byte smiley[8] = {  //Creating smiley pattern
  B00000,
  B10001,
  B00000,
  B00000,
  B10001,
  B01110,
  B00000,
};
void setup() {
  pinMode(Backlight, OUTPUT);
  attachInterrupt(0, wakeUp, CHANGE);
  digitalWrite(Backlight, HIGH);
  initLCD();
}

void loop() {
  unsigned long currentMillis = millis();
  if((currentMillis - refreshDHTmillis) > 3000){  //Refresh sensor value in every 3sec
    refreshDHT();
    refreshDHTmillis = currentMillis;
  }
  if((currentMillis - backlightMillis) > 30000){  //Turn off backlight in every 30 sec
    digitalWrite(Backlight, LOW);
  }
}
void refreshDHT(){
  int chk = DHT11.read(DHT11PIN); //Reading sensor value. Must call "read" even not error checking
  if(chk != DHTLIB_OK){  //Pring "E" as temp and humid value in case of any error
    lcd.setCursor(5, 1);  //Setting cursor to the Temp value
    lcd.print("E ");
    lcd.setCursor(14, 1);  //Setting cursor to Humid value
    lcd.print("E ");
  }
  else{  //Printing the Temp and Humid value if the response is OK
    lcd.setCursor(5, 1);
    lcd.print((int)DHT11.temperature, 10);  //Setting cursor to the Temp value
    lcd.setCursor(14, 1);
    lcd.println((int)DHT11.humidity, 10);  //Setting cursor to Humid value
  }
}
void initLCD(){
  lcd.createChar(0, smiley); //Putting smily pattern as character. Must be called before lcd.begin
  lcd.begin(16, 2);          //Initiating LCD
  //Row 0 initial message
  lcd.write(byte(0));        //Printing smily as first character
  lcd.print("  SNR Fridge  ");  //Printing Header
  lcd.write(byte(0));        //Printing smily as last character
  //Row 1 initial message
  lcd.setCursor(0, 1);       //Setting cursor for "Temp-" label
  lcd.print("Temp-");
  lcd.setCursor(8, 1);       //Setting cursor for "Humid-" label
  lcd.print("Humid-");
}
void wakeUp(){              //Wakeup Backlight as interrupt
  digitalWrite(Backlight, HIGH);
  backlightMillis = millis();
}